Arduino Nano Specifications/Functions
In this article, we will explain in detail the specifications and functions of Arduino Nano.
The Arduino Nano is an even smaller Arduino board compared to the Arduino Micoro. It can be used by inserting it directly into the breadboard.
In addition, the Arduino Nano Every is currently available, which has the same shape and footprint as the Arduino Nano, but with higher performance and lower cost.
For more information on the specifications and features of the Arduino Nano Every, please refer to the following article.
Arduino Nano Specifications
| Tech Specs | Arduino Nano |
|---|---|
| Board Size | 43.2×17.8mm |
| Microcontroller/ Clock Speed | ATmega328P/ 16MHz |
| SRAM (Main Memory) | 2kB |
| Flash Memory | 32kB |
| EEPROM | 1kB |
| Operating Voltage | +5V |
| Input Voltage (recommended) | +7~+12V |
| Output Voltage | +5V, +3.3V |
| Digital I/O Pins | 20 |
| PWM Digital I/O Pins | 6 |
| Analog Input Pins | 8 |
| Analog Output Pins (DAC) | - |
| Rated Current per Pin | 40mA/Pin |
| Program Writing Pins | Mini USB Type-B ICSP |
| Interface | UART I2C SPI |
For the specifications of Arduino boards other than Arduino Nano, please refer to the following article.
Arduino Nano Fuctions
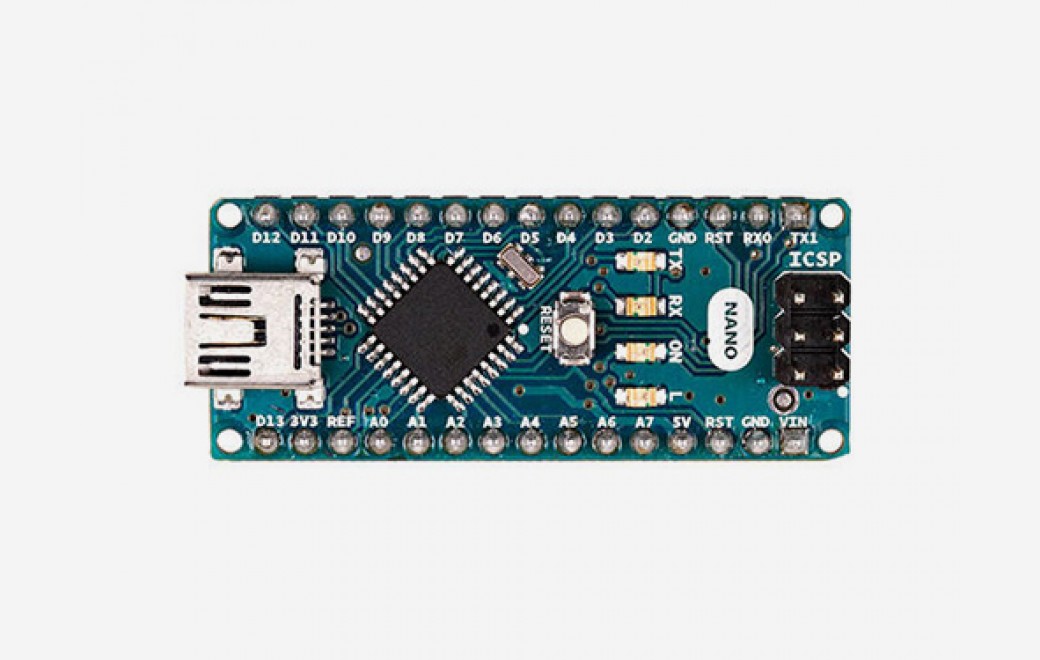
Arduino Nano Appearance
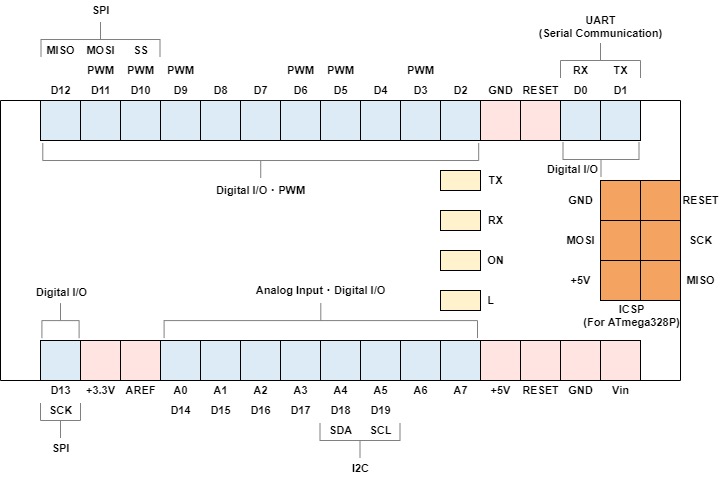
Pin Header Placement/LED Placement
↑Click to enlarge.
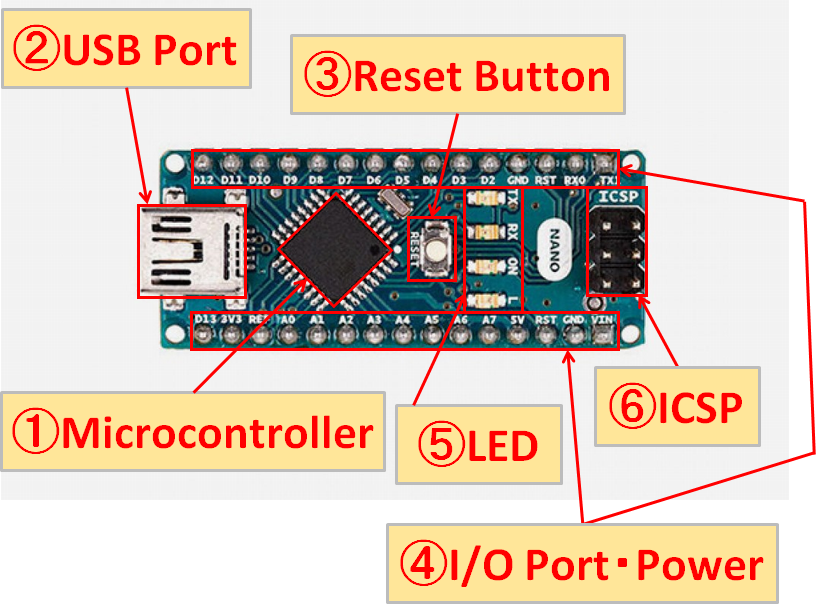
①Microcontroller(Microcomputer)
The microcontroller of the Arduino Nano uses “ATmega328P” from Microchip Technology(USA).
A microcontroller is a very important component in controlling electronic devices that correspond to the human “brain”.
In addition, various memories such as SRAM, Flash memory, and EEPROM are also built into the microcontroller.
②USB Port
By connecting the Arduino Nano to the USB port of your PC with a USB cable, you can communicate between the Arduino Nano and your PC.
Programs (sketches) created on the PC can be written to the Arduino Nano, and the Arduino Nano can be controlled from the PC via serial communication.
It also has the role of powering the Arduino Nano via USB, as it doesn't have a power jack like the Arduino Uno.
However, please note that the USB port is "Mini USB Type-B", which is becoming less popular.
③Reset Button
You can restart the Arduino Nano by pressing the reset button. Use this when you want to restart the program from the beginning or when the Arduino Nano behaves strangely.
④I/O Port・Power
Digital I/O・PWM
| Digital I/O・PWM | Explanation |
|---|---|
| D0-D19 | Digital input/output(0-19) HIGH(+5V)/LOW(0V) |
| PWM | 0 to +5V analog output Analog output by switching between 0V and +5V at high speed |
PWM and serial communication are shared with digital I/O. You can specify which one to use in the program.
Analog Input
| Analog Input | Explanation |
|---|---|
| A0-A7 | Analog input(0-7) 10-bit A/D converter(1step change every 4.8mV) |
Communication
| Communication | Explanation | |
|---|---|---|
| UART (Serial communication) | TX | Serial data transmission |
| 〃 | RX | Serial data reception |
| I2C | SCL | Serial clock |
| 〃 | SDA | Serial data transmission/reception |
| SPI | SS | Select device to control |
| 〃 | SCK | Serial clock |
| 〃 | MOSI | Master ⇒ Slave data transfer |
| 〃 | MISO | Slave ⇒ Master data transfer |
Power
| Power | Explanation |
|---|---|
| Vin | The voltage of "②USB Port" is output, Power can be supplied from "Vin" without using the USB Port. |
| GND | Ground/Reference point |
| +5V | +5V voltage output |
| +3.3V | +3.3V voltage output |
Other
| Other | Explanation |
|---|---|
| GND | Ground/Reference point |
| AREF | Analog input reference voltage (0 to +5V input), Not normally used |
| RESET | Reset (Same function as "③Reset Button") |
⑤LED
| LED | Explanation |
|---|---|
| ON | Lights up when the Arduino Nano is powered |
| TX | Blinks when sending via serial communication |
| RX | Blinks when receiving via serial communication |
| L | Connect to digital I/O No.13 |
Arduino Nano has 4 LEDs(chip parts). The “L” of LED is connected to the 13th digital I/O, and can be lighted up by setting the 13th pin to HIGH (5V) in the program.
⑥ICSP(For ATmega328P)
By connecting an ICSP-compatible writer(program writing device), you can write programs(sketches) directly to the “ATmega328P”, which is an Arduino Nano microcontroller(microcomputer).
However, since you can usually write programs(sketches) via the USB port, I think that it is rarely used for writing purposes.
In addition, it can also be used as an SPI terminal.
How to get technical data for Arduino Nano
Various technical materials of Arduino Nano can be obtained from the official Arduino website.
- EAGLE FILES
- SCHEMATICS: PDF Format
First, go to the Arduino official website from the link below.


Click “DOCUMENTATION”.
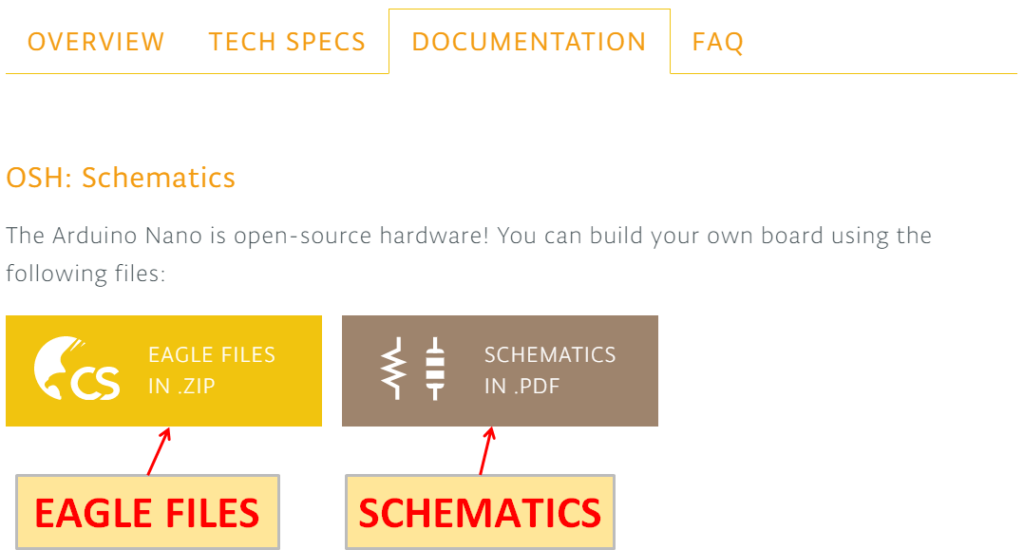
Click each icon to download the “EAGLE FILES” and “SCHEMATICS”.